Just a quick little post to share another tasty dish with you all. :) I first tried this yummy breakfast about a month ago thanks, again, to PW. It was fairly easy to whip up, and the fact that I could make it ahead of time and then just pop them in the oven (as many as I needed) and have them ready in 5-10 minutes was a huge plus for me!
English muffins, eggs, bacon, cheese, garlic powder, mayo, dijon, worcestershire....strange combination? Maybe. Delicious? Absolutely! My entire family got the opportunity to enjoy....
Make-Ahead Muffin Melts
PW's photo spread of these beauties was enough for me but wowee, once I tasted them, I was hooked. I'm not a big mustard person but the dijon was just the flavor these babies needed. Ree is absolutely right...you can't leave it out. They just wouldn't be the same!
Here's my one sad shot from my iPhone...haha...enjoy!
Wednesday, September 8, 2010
Thursday, August 26, 2010
If I Had My Little Way...
...I'd eat peaches everyday...ok enough with the song lyrics. It's just stuck in my head now. *sigh*
Ok so I have one more delicious peach recipe that I could resist sharing with all of you. Again, I have to give credit to my sis for finding this one. (She's the brains in this operation, let's be honest.) Leave it to Real Simple to come up with a recipe this easy and delicious...love it!
Peach Crisp Recipe (from Real Simple)
The only thing I did differently was that I omitted the almonds. And really, I only did that because I just happened to have everything else I needed for this recipe and didn't feel like making a trip to the grocery store just for almonds. It was amazing without them!
People, make this recipe. Just do it. You'll thank me later. :)
Ok so I have one more delicious peach recipe that I could resist sharing with all of you. Again, I have to give credit to my sis for finding this one. (She's the brains in this operation, let's be honest.) Leave it to Real Simple to come up with a recipe this easy and delicious...love it!
Peach Crisp Recipe (from Real Simple)
The only thing I did differently was that I omitted the almonds. And really, I only did that because I just happened to have everything else I needed for this recipe and didn't feel like making a trip to the grocery store just for almonds. It was amazing without them!
People, make this recipe. Just do it. You'll thank me later. :)
Monday, August 23, 2010
Peaches Come From a Can...
...they were put there by a man, in a factory downtown. (Thank you POTUSA)
Been promising to share more peach recipes so even though it's not peach week anymore (remember it's just like shark week only...nevermind...that's getting old) I have a couple more to share so I hope you're ready for them! I promise to make it quick. :) Lucky for you, this one even has pictures with it! (Just another little something to make sure your mouth is watering!)
I found this recipe for peach pie on http://www.suite101.com/. It's a new website to me but after tasting the results of this pie (it was so good I made another one the following week) I will definitely be back for more.
Peach Pie Recipe with Fresh Peaches (by suite101.com)
First, let me be honest and say I skipped making my own crust...again. One of these days I'll do it but lately I've just been in one of those moods to speed things up so I grabbed a couple Schnucks brand refrigerated crusts that you roll out into your pie pan and are ready to go. Fantastic folks.
Oh yes, I promised pictures...here goes!
Hope you enjoy this one as much as we did!
Been promising to share more peach recipes so even though it's not peach week anymore (remember it's just like shark week only...nevermind...that's getting old) I have a couple more to share so I hope you're ready for them! I promise to make it quick. :) Lucky for you, this one even has pictures with it! (Just another little something to make sure your mouth is watering!)
I found this recipe for peach pie on http://www.suite101.com/. It's a new website to me but after tasting the results of this pie (it was so good I made another one the following week) I will definitely be back for more.
Peach Pie Recipe with Fresh Peaches (by suite101.com)
First, let me be honest and say I skipped making my own crust...again. One of these days I'll do it but lately I've just been in one of those moods to speed things up so I grabbed a couple Schnucks brand refrigerated crusts that you roll out into your pie pan and are ready to go. Fantastic folks.
Oh yes, I promised pictures...here goes!
So first you mix together sliced peaches, flour, sugar, cinnamon (or nutmeg...or both!) and some lemon juice. I could probably eat it just like this. Maybe not....
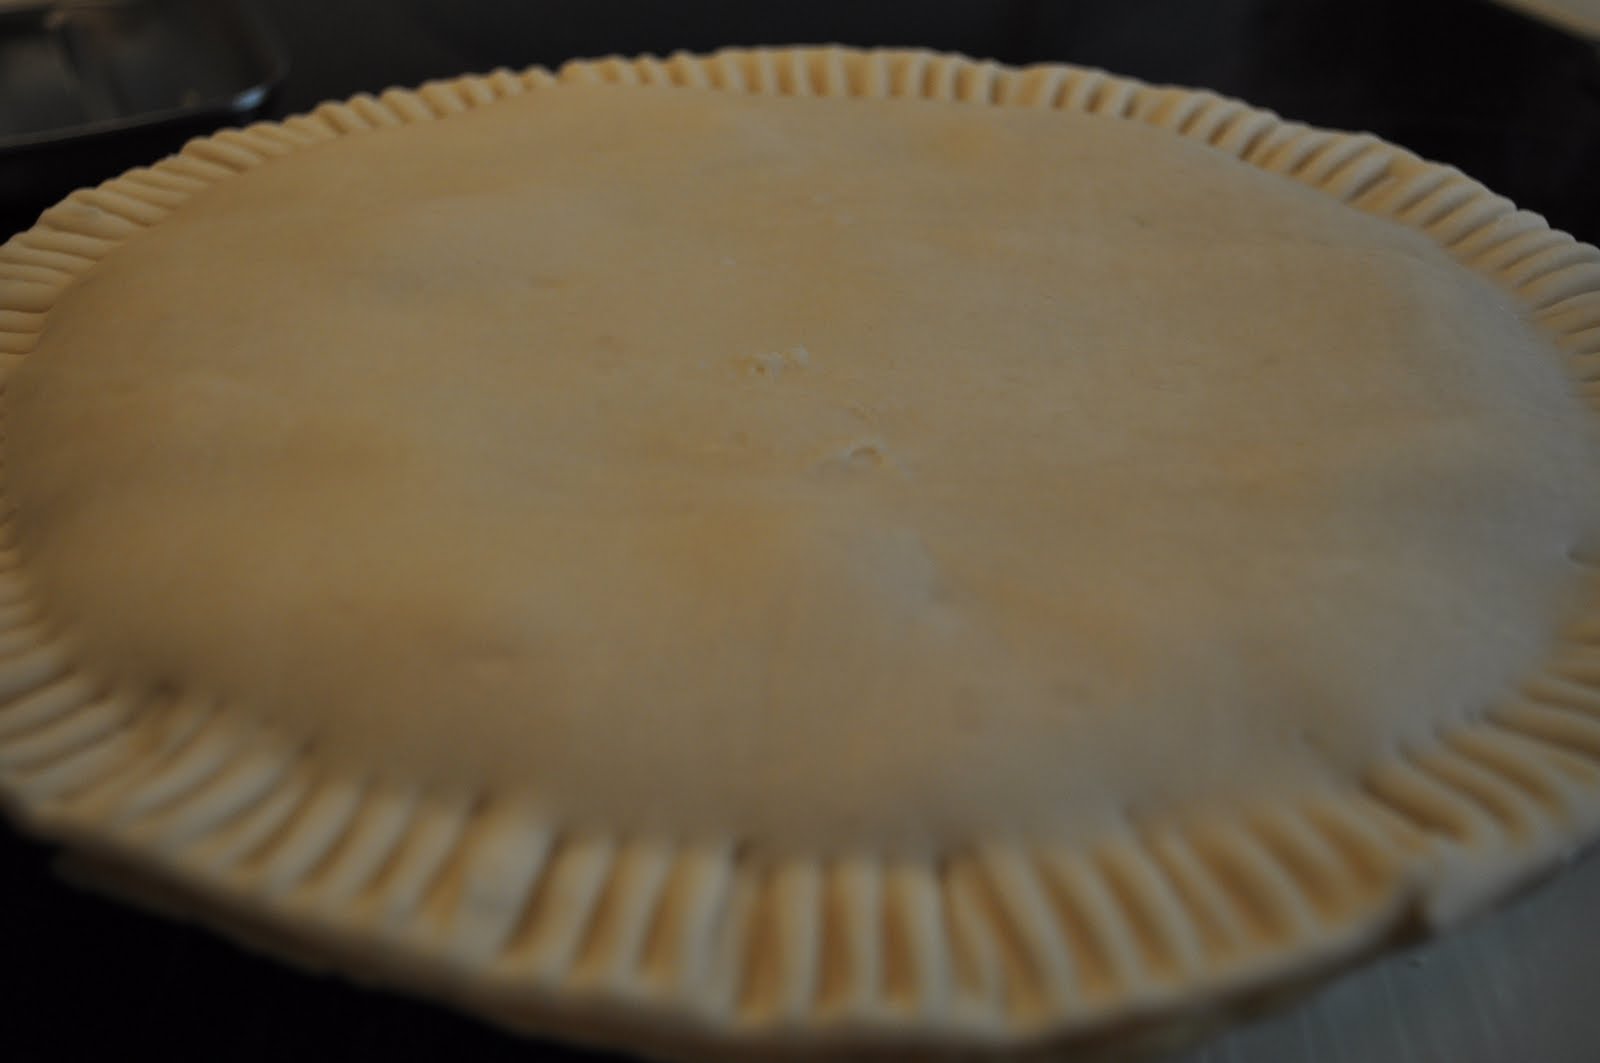
Then spoon it into the crust, toss another crust on top, and use a fork to seal the two crusts together, just like this!
Then you can trim off the excess with a sharp knife. Do you have any idea how hard it was to get this shot? Major balancing act. Next time, I use the tripod and the timer function on the camera...sheesh.
Almost ready for the oven...
But first you have to baste it with a little milk. I used skim cause that's what I have at my house. Any would be fine.
Then sprinkle the cinnamon sugar mixture over the top and cut some vents in the tip crust.
Pop it in the oven and VOILA it magivally changes into a different pie pan! LOL...no really, this was the second one I made (told you I made two) just so I could show off my new pie pan. :) Isn't it purdy?
Oh buddy.
Don't mind if I do...
Labels:
peach,
peach pie,
peach week,
recipe
Tuesday, August 10, 2010
Spice Things Up...With Peaches!
It's still Peach Week (just like Shark Week but tastier!) and today I decided to share a recipe that my hubby and I tried last week as we slowly finished off our crop of peaches from Eckert's. Sure, I have been slaving over a toasty oven making delicious peach desserts for the past couple weeks since we went peach picking but this time I decided to trade in the oven for the quesadilla maker.
That's right folks, peach quesadillas! When I first saw this recipe in this month's Cooking Light, I questioned it. Then I remembered, hello, peach salsa, why wouldn't that flavor work in a quesadilla?! Here's the recipe for Cooking Light's Pepper Jack, Chicken, and Peach Quesadillas. I would have loved to try this recipe just as it is written but I didn't have any pepper jack cheese or cilantro (and then I got sidetracked and completely forgot to make the honey sour cream...holy smokes I can't wait to try that!) So in true Lauren's Leftovers style, I made it up.
Lauren's Peachy-Keen Quesadillas (inspired by Cooking Light)
6 small flour tortillas
1 large, ripe (but firm) peach
2 chicken breasts (of the boneless, skinless variety)
2 Tbls. Homemade Gourmet Chicken Enchilada Soup Seasoning
1 cup shredded cheddar cheese
Grill chicken breasts on a Foreman Grill or grill pan. When cooked through, sprinkle each chicken breast with 1/2 Tbls. of seasoning, turn over, and sprinkle the rest of the seasoning. Slice into thin strips (or you can use two forks to "pull" your chicken) and set aside momentarily. Peel and slice peach thinly. Place one tortilla on quesadilla maker surface, sprinkle cheese on top, add a layer of chicken, then a single layer of peach slices. Place another tortilla on top and close quesadilla maker for 3-5 minutes or until golden brown. Repeat with remaining tortillas, chicken, and peaches.
These were simple, quick, and delicious! Remember you can improvise with any tasty recipe you find if you don't have all the ingredients. Experimentation is the name of the game! Not sure where to start? Find a recipe you love or a food you like to eat and then think about the flavors involved and go from there! I can't guarantee you'll get a winner every time but starting with something simple, like this quesadilla recipe, is a great place to get started! Good luck and happy eating!
That's right folks, peach quesadillas! When I first saw this recipe in this month's Cooking Light, I questioned it. Then I remembered, hello, peach salsa, why wouldn't that flavor work in a quesadilla?! Here's the recipe for Cooking Light's Pepper Jack, Chicken, and Peach Quesadillas. I would have loved to try this recipe just as it is written but I didn't have any pepper jack cheese or cilantro (and then I got sidetracked and completely forgot to make the honey sour cream...holy smokes I can't wait to try that!) So in true Lauren's Leftovers style, I made it up.
Lauren's Peachy-Keen Quesadillas (inspired by Cooking Light)
6 small flour tortillas
1 large, ripe (but firm) peach
2 chicken breasts (of the boneless, skinless variety)
2 Tbls. Homemade Gourmet Chicken Enchilada Soup Seasoning
1 cup shredded cheddar cheese
Grill chicken breasts on a Foreman Grill or grill pan. When cooked through, sprinkle each chicken breast with 1/2 Tbls. of seasoning, turn over, and sprinkle the rest of the seasoning. Slice into thin strips (or you can use two forks to "pull" your chicken) and set aside momentarily. Peel and slice peach thinly. Place one tortilla on quesadilla maker surface, sprinkle cheese on top, add a layer of chicken, then a single layer of peach slices. Place another tortilla on top and close quesadilla maker for 3-5 minutes or until golden brown. Repeat with remaining tortillas, chicken, and peaches.
These were simple, quick, and delicious! Remember you can improvise with any tasty recipe you find if you don't have all the ingredients. Experimentation is the name of the game! Not sure where to start? Find a recipe you love or a food you like to eat and then think about the flavors involved and go from there! I can't guarantee you'll get a winner every time but starting with something simple, like this quesadilla recipe, is a great place to get started! Good luck and happy eating!
Labels:
cooking light,
peach,
quesadillas,
recipe
Monday, August 9, 2010
Peach Week!
It's peach week on Lauren's Leftovers! Just like Shark Week only it doesn't make you afraid to go swimming in the ocean. ;)
I just love peach season. There's something irresistable about a perfectly ripe peach...though these gems are better eaten alone so no one else has to hear you slurping or see you with peach juice running down your face...am I right or am I right? But beyond just tearing into one of these golden beauties, there are so many amazingly delicious things (read: desserts) you can make with them! First, don't forget about last year's peach post featuring a chilled peach pie...mmm. But never fear, I have plenty of other peachy keen wonderful recipes to share this year! Case in point...
The Lady and Sons Peach Cobbler
This was a recipe of Paula Deen's that my sister said she was gonna make, but I beat her to it. ;) Hubby loved it. Gobbled it up. It has a little bit of a different texture to the "crust" and mine didn't seem to raise up through the fruit like Paula promised (I swear I didn't stir it!) but it sure did taste good. Here see a few pics of me making it!
I just love peach season. There's something irresistable about a perfectly ripe peach...though these gems are better eaten alone so no one else has to hear you slurping or see you with peach juice running down your face...am I right or am I right? But beyond just tearing into one of these golden beauties, there are so many amazingly delicious things (read: desserts) you can make with them! First, don't forget about last year's peach post featuring a chilled peach pie...mmm. But never fear, I have plenty of other peachy keen wonderful recipes to share this year! Case in point...
The Lady and Sons Peach Cobbler
This was a recipe of Paula Deen's that my sister said she was gonna make, but I beat her to it. ;) Hubby loved it. Gobbled it up. It has a little bit of a different texture to the "crust" and mine didn't seem to raise up through the fruit like Paula promised (I swear I didn't stir it!) but it sure did taste good. Here see a few pics of me making it!
First you melt the butter in the 9x13 pan in the oven.
Be careful not to start this before you're ready or the butter will begin to brown.
If you're using fresh peaches like I did, follow Paula's directions closely for preparing them and creating the delicious syrup that comes with cooking them in the sugary water.
Get your batter all mixed up. You don't need to use a stand mixer but I was worried mine was feeling neglected lately and we can't have that.
Next, take the dish out of the oven and pour the batter into the butter. Try saying that 5 times fast. No stirring at this point!
Then spoon the peaches on top and pour the syrup over the entire thing. Don't forget to sprinkle cinnamon on top! And remember...NO stirring!
Pop it in the oven and let it do it's thing!
Isn't that beautiful?! You can kind of see the "crust" coming up in a few places. I guess I just expected it to do that in a more dramatic fashion. I like dramatics.
Don't mind if I do. ;)
Labels:
Paula Deen,
peach,
peach cobbler,
recipe
Friday, August 6, 2010
Freebie Friday: Tax Free Edition
It's Tax Free weekend in Missouri! Woohoo! You know what that means...no state tax on clothing purchases under $100, school supply purchases, and computers and some other electronics. Get all the details here.
But beyond just taking a tax holiday this weekend, Sam's Club is waiving it's member fees for the weekend! That's right, even if you're not a Sam's member, you too can get a ridiculous amount of avocados, ground beef, or ranch dressing for a ridiculously low price this weekend! ;) So head on over to Sam's...there's sure to be a crowd but it'll be worth it when you don't have to buy toilet paper for the next year, right?
Labels:
freebie friday,
Sam's Club,
tax free weekend
Thursday, August 5, 2010
Joy of Baking Pound Cake
Ah the Joy of Baking...literally. How I love to turn your (digital) pages and know that every recipe in you is sure to be delicious. *sigh* No wonder, then, that I turned to them when I needed to whip up a pound cake to pour all that compote over (see yesterday's post)! Now Joy of Baking strays from the traditional 1:1:1:1 ratio of flour, sugar, eggs, and butter (1 pound of each...how pound cake got its name) but the product is absolutely divine. Still uses all four original ingredients but with a splash of milk, some vanilla, baking powder, salt, and a lot of love (gag gag...sorry...couldn't help myself).
Joy of Baking Pound Cake
This recipe beats the store bought kind hands down (sorry Sara Lee) and my husband looks forward to the next time I decide to make one. :)
Joy of Baking Pound Cake
This recipe beats the store bought kind hands down (sorry Sara Lee) and my husband looks forward to the next time I decide to make one. :)
Labels:
joy of baking,
pound cake,
recipe
Wednesday, August 4, 2010
Berry Season Draws to a Close
Quick! Quick! Get to your local grocer, farmer's market, Eckert's, anywhere and buy berries! They are still in season (well most of them anyway) and can be found ripe and relatively cheap this time of year. When you get some...you must try this!
Berry Compote (from epicurious.com)
2 1/2 cups fresh berries (blueberries, raspberries, blackberries...you get to pick!)
1/3 cup sugar
1/3 cup water
Bring 1 1/2 cups berries, sugar, and water to a boil and simmer over medium heat until berries burst or begin to mush. (Blueberries will burst, others will mush.) Be sure to stir frequently to avoid burning. Add remaining berries and continue simmering until compote begins to coat the spoon. About an additional 10 minutes. Serve warm over ice cream or pound cake (see tomorrow's post!) or chill to serve later (warm it up, it's better that way!)
You can also try this over pancakes...mmm...pancakes...
Berry Compote (from epicurious.com)
2 1/2 cups fresh berries (blueberries, raspberries, blackberries...you get to pick!)
1/3 cup sugar
1/3 cup water
Bring 1 1/2 cups berries, sugar, and water to a boil and simmer over medium heat until berries burst or begin to mush. (Blueberries will burst, others will mush.) Be sure to stir frequently to avoid burning. Add remaining berries and continue simmering until compote begins to coat the spoon. About an additional 10 minutes. Serve warm over ice cream or pound cake (see tomorrow's post!) or chill to serve later (warm it up, it's better that way!)
You can also try this over pancakes...mmm...pancakes...
Monday, August 2, 2010
More "inspired" picnic food
So last week I wrote a post about some delicious Pesto Chicken Wraps...remember those bad boys? Yep. I thought so. Well on that same "inspired picnics" link, #91 (on page 5) caught my eye. For the record--I was never a fan of pasta salad until recent years. Even more important to note is that I have only ever made pasta salad from a mix or bought it at the deli counter at my local Schnuck's because their Taco Pasta Salad is amazing. Lastly, I now whole-heartedly disagree with the writer's statement that pasta salads are no good. Boo on that. Yes, some pasta salads are no good. No, pasta salads in general are not no good (whoa too many negatives). I supposed everyone is entitled to their opinion but come on...you just made pasta salad, don't try to call it something else because you like to stick your nose up at pasta salad...I digress (again!!!)
So I took his lead and whipped up a simple pasta salad, yes, it's a PASTA SALAD!! Simple being the keyword here...anyone can do this and adjust anything to their own taste. It's totally up to you!
Easy Pasta Salad
10 oz. rotini pasta, cooked, rinsed in cold water, and drained
12 grape tomatoes (b/c grape tomatoes are cheaper than cherry tomatoes...go figure) quartered and seeded
4 oz. cubed mozzerella (small cubes...think half of bite-sized or smaller)
1-4oz. can sliced black olives, drained
2 Tbls. EVOO (if it looks dry, add a little more)
salt and pepper to taste
Put all ingredients in a bowl, stir to combine and chill until ready to serve. So easy, makes you wanna slap yo mama! (Anyone else ever heard that commercial on the radio? It makes me crazy but gets stuck in my head all the time. Anyone? Anyone? Bueller?)
Like I said before, you can pretty much put anything you like/have in this pasta salad and can't go wrong. Ok, so maybe not that jar of peanut butter that's in your pantry...then you would be going seriously wrong...seriously! Enjoy!
So I took his lead and whipped up a simple pasta salad, yes, it's a PASTA SALAD!! Simple being the keyword here...anyone can do this and adjust anything to their own taste. It's totally up to you!
Easy Pasta Salad
10 oz. rotini pasta, cooked, rinsed in cold water, and drained
12 grape tomatoes (b/c grape tomatoes are cheaper than cherry tomatoes...go figure) quartered and seeded
4 oz. cubed mozzerella (small cubes...think half of bite-sized or smaller)
1-4oz. can sliced black olives, drained
2 Tbls. EVOO (if it looks dry, add a little more)
salt and pepper to taste
Put all ingredients in a bowl, stir to combine and chill until ready to serve. So easy, makes you wanna slap yo mama! (Anyone else ever heard that commercial on the radio? It makes me crazy but gets stuck in my head all the time. Anyone? Anyone? Bueller?)
Like I said before, you can pretty much put anything you like/have in this pasta salad and can't go wrong. Ok, so maybe not that jar of peanut butter that's in your pantry...then you would be going seriously wrong...seriously! Enjoy!
Labels:
fast recipe,
pasta salad,
recipe
Friday, July 30, 2010
Happy Birthday Lauren's Leftovers!!
That's right folks! It's my birthday! Well, the blog's...mine is about 6 months away and I would like a cast iron skillet and the pasta attachment set for my Kitchenaid mixer...but I digress. (I do that a lot, don't I?) Anyway, to celebrate the birth of this blog one year ago today, I thought it would be fitting to share this Freebie Friday treat with you so you can get pampered on and around YOUR birthday! Special thanks to my sis for sharing! (I swear she gets more shout outs on this blog...sheesh)
The Frugal Girls have an entire list of birthday/birthday week freebies available across the country! You could spend an entire afternoon signing up for these things, seriously, and I plan to. Might even be worth a trip to Memphis to use the $30 Benihana gift certificate...roadtrip anyone??
Labels:
birthday deals,
freebie friday,
Frugal Girls
Thursday, July 29, 2010
Pesto: The Trilogy
Pesto is more than just great on pasta...have you tried it as a spread on sandwiches or wraps? Case in point: this guy right here!
Pesto Chicken Rolls
Check out number 2 on the list (Should be #1 in my opinion, even though I fully realize that this is in no way a ranking system, it just feels right.) These were super easy to make and were SO delicious! My hubby and I took them to an outdoor concert and then, lucky us, had plenty for lunch the next day too! They would be great for a trip to the wineries...mmm...wineries. Note to self :: when it cools down, we must go to the wineries.
Try them. Today. (or tomorrow...or never, whatever floats your boat)
Pesto Chicken Rolls
Check out number 2 on the list (Should be #1 in my opinion, even though I fully realize that this is in no way a ranking system, it just feels right.) These were super easy to make and were SO delicious! My hubby and I took them to an outdoor concert and then, lucky us, had plenty for lunch the next day too! They would be great for a trip to the wineries...mmm...wineries. Note to self :: when it cools down, we must go to the wineries.
Try them. Today. (or tomorrow...or never, whatever floats your boat)
Labels:
pesto,
pesto chicken rolls,
recipe
Wednesday, July 28, 2010
Pesto...continued
So last week I promised more ways to use your pesto...sorry I'm just getting around to sharing some now! Enjoy this super easy homemade pesto mac 'n cheese! (Just for you Megan!)
Lauren's Pesto Mac (& Cheese!)
You will need:
1 recipe Velveeta Down Home Mac & Cheese (minus Ritz crackers, plus breadcrumbs...heehee)
1 cup (or more) of the delicious pesto you already made
The trick is, before you pour the mac & cheese into the 8x8 or 9x9 casserole dish, put a little pesto at the bottom. Then pour only half of the mac & cheese on top, followed by more pesto, followed by the rest of the mac & cheese, then the rest of the pesto! Don't forget to top with cheddar cheese and the breadcrumb mixture and don't stir it! The pesto will work its way around as it bakes, trust me.
A few days after I made this, I went to lunch with some girlfriends at Cheese-ology in the Loop (an all mac & cheese restaurant...oh buddy!) Turns out they have a pesto mac too! I decided to try The Hill (provel, salsiccia, marinara...mmmm) but it was tempting to see how similar our pesto macs are! The Mediterranean and the Bacon, Bacon were also calling my name...I guess that means I'm just gonna have to go back!
Lauren's Pesto Mac (& Cheese!)
You will need:
1 recipe Velveeta Down Home Mac & Cheese (minus Ritz crackers, plus breadcrumbs...heehee)
1 cup (or more) of the delicious pesto you already made
The trick is, before you pour the mac & cheese into the 8x8 or 9x9 casserole dish, put a little pesto at the bottom. Then pour only half of the mac & cheese on top, followed by more pesto, followed by the rest of the mac & cheese, then the rest of the pesto! Don't forget to top with cheddar cheese and the breadcrumb mixture and don't stir it! The pesto will work its way around as it bakes, trust me.
A few days after I made this, I went to lunch with some girlfriends at Cheese-ology in the Loop (an all mac & cheese restaurant...oh buddy!) Turns out they have a pesto mac too! I decided to try The Hill (provel, salsiccia, marinara...mmmm) but it was tempting to see how similar our pesto macs are! The Mediterranean and the Bacon, Bacon were also calling my name...I guess that means I'm just gonna have to go back!
Labels:
Cheese-ology,
Loop,
macaroni and cheese,
pesto,
recipe
Tuesday, July 20, 2010
Pesto Platform
Sorry to be away so long folks! It's been a busy summer but I'm back and have so much to catch you up on! I wanna start with my simple pesto recipe that I will build off of for the rest of this week. If you like pesto, you'll love these recipes! Let's get started!
So I had a TON of basil ready to go in my garden a couple weeks ago so I decided it was time to harvest and put it to good use...just enough for a great big batch of pesto! My pesto calls for walnuts and pine nuts but if you would prefer a walnut free version, there are plenty of others out there to choose from!
Perfect Pesto
1/4 cup chopped walnuts
1/4 cup pine nuts
1 Tbls. minced garlic (more if you like)
5 cups fresh basil leaves
pinch of salt
generous amount of fresh ground black pepper (I said generous, not crazy)
1 1/4 to 1 1/2 cups EVOO (I went for the full 1 1/2 for this batch)
1 cup parmesan cheese
Process nuts and garlic in your food processor before adding basil, salt, and pepper and continuing to process. Slowly add in oil through the processor's spout while the processor is on for perfect blending. Once all oil is incorporated, add cheese and process one last time! (If you have a mini-prep processor, you'll be happy to know this whole batch will fit if you add your basil in two additions. You'll also want to add your oil in about three separate additions since you have to stop the processor to add.)
Serve immediately over pasta or store in the fridge for a week or two with a thin film of oil on top (it will create one for itself in time but it never hurts to add a little drizzle once you have it in its storage container.)
Next up...more ways to use your pesto! Stay tuned! :)
So I had a TON of basil ready to go in my garden a couple weeks ago so I decided it was time to harvest and put it to good use...just enough for a great big batch of pesto! My pesto calls for walnuts and pine nuts but if you would prefer a walnut free version, there are plenty of others out there to choose from!
Perfect Pesto
1/4 cup chopped walnuts
1/4 cup pine nuts
1 Tbls. minced garlic (more if you like)
5 cups fresh basil leaves
pinch of salt
generous amount of fresh ground black pepper (I said generous, not crazy)
1 1/4 to 1 1/2 cups EVOO (I went for the full 1 1/2 for this batch)
1 cup parmesan cheese
Process nuts and garlic in your food processor before adding basil, salt, and pepper and continuing to process. Slowly add in oil through the processor's spout while the processor is on for perfect blending. Once all oil is incorporated, add cheese and process one last time! (If you have a mini-prep processor, you'll be happy to know this whole batch will fit if you add your basil in two additions. You'll also want to add your oil in about three separate additions since you have to stop the processor to add.)
Serve immediately over pasta or store in the fridge for a week or two with a thin film of oil on top (it will create one for itself in time but it never hurts to add a little drizzle once you have it in its storage container.)
Next up...more ways to use your pesto! Stay tuned! :)
Friday, June 18, 2010
Freebie Friday 6/18/10
Groupon! Do you subscribe to groupon yet? If you don't, you should, and let me tell you why.
1. Great deals in St. Louis! (That really is the one and only reason...who doesn't love a great deal?)
Case in point...today's Groupon deal. (You better go sign up quick if you want to take advantage of this one!) Today you can purchase a $30 gift certificate to Portabella restaurant in Clayton (see my review here) for only $13!! That's 57% off! Gotta love deals like that!
Groupon is more than just food! I also took advantage of a sweet 50% off Cardinals tickets deal they had earlier this week and will be heading to my first game of the season in a couple weeks for half the price...love it. Seriously, sign up, it's worth it!
1. Great deals in St. Louis! (That really is the one and only reason...who doesn't love a great deal?)
Case in point...today's Groupon deal. (You better go sign up quick if you want to take advantage of this one!) Today you can purchase a $30 gift certificate to Portabella restaurant in Clayton (see my review here) for only $13!! That's 57% off! Gotta love deals like that!
Groupon is more than just food! I also took advantage of a sweet 50% off Cardinals tickets deal they had earlier this week and will be heading to my first game of the season in a couple weeks for half the price...love it. Seriously, sign up, it's worth it!
Thursday, June 17, 2010
Rosemary Skewers--Thank You Ree!
Ree Drummond (aka The Pioneer Woman), what will you come up with next?! Actually, I already know the answer cause I just saw today's blog post and am already trying to figure out when I'm gonna have time to make it...heehee...don't worry, I'll post it when I make it. For now, you can check out PW's blog (excuse me...website...hers is hardly just a blog) for yourself. Her posts are always infinitely better than mine anyway. :)
Where was I? Ah yes, so last week I stumbled across PW's (read: P Dub) tweet (that's right folks, I tweet...are you following @STLleftovers on twitter yet???) telling me that I MUST make these for my next party. Well, dinner party tonight at a friend's house and I'm in charge of the appetizer...sounds like it's time to obey PW's orders!
Now I realize I just included the link to Ree's rundown of the rosemary skewers but I have included just a touch more detail via photo (one really) so I thought I'd share my go at it as well. Enjoy!
Rosemary Skewers (from The Pioneer Woman Cooks)
Stalks of fresh rosemary (I think I used 12)
fresh mozzarella cheese (8 oz worked for 12 skewers)
marinated artichoke hearts, drained (small jar...not canned)
black or kalamata olives, drained (I used medium black olives)
salami, sliced thin and folded into fourths (or pepperoni folded in half...I chose pepperoni)
1/4 cup olive oil
1 1/2 Tbls. balsamic vinegar
pinch of salt
fresh ground black pepper (lots!)
sprinkle of ground thyme
In honor of Ree here's my "cast of characters" minus salt, pepper, and thyme...they are shy.
Note the store bought rosemary...I also used some straight from my own herb garden but was too afraid I would use it all so I supplemented with organic...small price to pay not to destroy my rosemary in one go.
Ok so first you need to strip your rosemary stalks of all but about an inch at the top...
I'm now realizing that I'm going to have to make rosemary focaccia again since I have all this rosemary stripped...oh darn. Mom, looks like you're getting some focaccia after all!
Step 2: Use rosemary stalk as a skewer and put all your tasty items on in whatever order you choose.
This very special skewer is for my hubby. :)
See, even on girls' night he benefits.
When you have all your skewers made...(tada!)
...you can whip up the "dressing" to top it with. Mix oil, vinegar, salt, pepper, and thyme in a bowl and whip em up until emulsified. I just used a fork real quick. Piece of cake...or mozzerella...whatever.
See? Easy. Then drizzle it all over your tasty skewers and voila! A delicious summer treat all ready for the fridge. I made mine the morning of but you can even assemble a day ahead and refrigerate...the rosemary flavor will REALLY come through if you leave them overnight. I'm hoping 6-7 hours will be enough for me.
Look at those beauties. It was very hard for me not to sample one just yet (don't olives have eyes? I think they were lookin' at me.) but I'm waiting as patiently as I can to have one...or ten if the other girls aren't fast enough...at dinner club tonight!
Labels:
appetizers,
Pioneer Woman,
recipe,
Ree Drummond,
rosemary skewers
Tuesday, June 15, 2010
Ask Lauren is Back!
Wow this "Ask Lauren" is so far overdue it's not even funny...well, maybe a little bit funny. Ok, not really. Anyway, a friend and colleague of mine (Hi Jennifer!) gave me a recipe for focaccia months ago...so long ago that I can't even remember when it was anymore. Her problem: baking with yeast. It can be tricky, and I've definitely had my flops (literally) with it in the past, but there is a secret to making sure your bread recipes will turn out everytime.
First secret...don't use a packet of yeast that has been sitting in your pantry forever. Yes, it can go bad. Not sure if your yeast is good? Proof it! (see below)
Second secret...water temperature while "proofing" the yeast. Proofing is when you "prove" that the yeast is still active before you prove it with a loaf of bread that refuses to rise. Follow your recipe (most call for proofing but don't call it proofing...did you follow that?) but basically you will be using very warm (usually between 100 and 120 degrees) water and sugar (amounts vary by recipe) which you will mix together and then pour the yeast on top. Wait 10 minutes and see if your yeast bubbles. Bubbles=good yeast, continue with your recipe. No bubbles=bad yeast, try again with a fresh packet. No bubbles could also indicate that your water was too hot (killed the yeast) or too cool (didn't activate it) so use a candy thermometer to test your water temp if you think that might be the problem. (Unfortunately I forgot to take a picture of the proofing process...this is what happens when I get excited while baking...sigh.)
So...here we go...focaccia!! (The recipe just called it focaccia (low-fat) but I'm jazzin' it up a bit...)
Rosemary Parmesan Focaccia
2 1/2 to 3 cups all-purpose or bread flour
2 Tbls. chopped fresh or 1 Tbls. dried rosemary leaves, crumbled
1 Tbls. sugar
1 tsp. salt1 pkg. regular or quick active dry yeast (I used Hodgson Mill fast rise active dry yeast packets)
3 Tbls. olive or vegetable oil (I used EVOO)
1 cup very warm water (120 degrees)
2 Tbls. olive or vegetable oil (I used EVOO)
1/4 cup grated Parmesan cheese
Step 1: Break out your sweet candy apple red Kitchen Aid mixer (don't have one? a hand mixer works too) and mix 1 cup of the flour, rosemary, sugar, salt, and yeast in a large bowl. Add 3 Tbls of oil and warm water. (This is when you could choose to proof your yeast. Instead of putting all ingredients together, mix water and sugar in a separate bowl and pour yeast over top, let stand 10 minutes, when bubbly you know it's good and can pour the whole mixture in with the other ingredients.)
Step 2: Beat with electric mixer on medium speed (I used dough hook on speed 2) for 3 minutes, scraping bowl frequently. Stir in enough remaining flour until dough is soft and leaves sides of bowl.
Step 3: Place dough on lightly floured surface. Knead 5-8 minutes or until dough is smooth and springy. Or, if you're lazy like me, using the dough hook again, leave it in your mixer for another 5 minutes, adding just a touch of flour. Place dough in large bowl greased with shortening (I used cooking spray), turning dough to grease all sides. Cover bowl loosely with plastic wrap or a clean kitchen towel and let rise in warm place about 30 minutes or until almost double. Dough is ready if indentation remains when touched.
Note: Great trick for rising dough...turn your oven on set to 400 degrees for 1 minute. Turn oven off, place bowl with dough (covered) in oven and close the door. This is a perfect environment for rising. Just don't forget to turn the oven off after just one minute!!
Step 4: Grease 2 cookie sheets or 12-inch pizza pans with small amount of oil (or cooking spray in my case). Gently push fist into dough to deflate. Divide dough in half. Shape each half into a flattened 10-inch round on a cookie sheet.
Cover loosely with plastic wrap lightly sprayed with cooking spray and let rise in warm place about 30 minutes or until double.
Step 6: Heat oven to 400 degrees. Gently make depressions about 2 inches apart in dough with fingers.
Carefully brush with 2 Tbls. oil; sprinkle with parmesan cheese.
Bake 15-20 minutes or until golden brown.
Serve warm or cool.
Look at that beautiful focaccia! Mmmmm...we had some that night with some olive oil, balsamic vinegar, pepper and parmesan cheese for dipping.
I also gave a loaf to my sister (I called it Birthday Focaccia for her...haha!) and she made a sandwich with it. Tomato, cucumber, and a little garden veggie cream cheese...oh yumm.
Give it a shot folks...baking with yeast really can be very rewarding! :) Happy baking!
Saturday, June 5, 2010
Top Five "Frozen Treat" Locations
Summer is here...it's time for ice cream! (and other related frozen treats!)
Here they are...my Top Five Frozen Treat Locations!
5. Cold Stone Creamery
4. Oberweis
3. Silky's (formerly Lix)
2. Fritz's Frozen Custard
And my Number One favorite frozen treat location...not a big surprise here...
1. Ted Drewes Frozen Custard
Notice the top three are all custard joints...that's all thanks to my wonderful husband and his custard addiction. If it was up to him we would live right behind Ted Drewes, right honey?
Here they are...my Top Five Frozen Treat Locations!
5. Cold Stone Creamery
4. Oberweis
3. Silky's (formerly Lix)
2. Fritz's Frozen Custard
And my Number One favorite frozen treat location...not a big surprise here...
1. Ted Drewes Frozen Custard
Notice the top three are all custard joints...that's all thanks to my wonderful husband and his custard addiction. If it was up to him we would live right behind Ted Drewes, right honey?
Labels:
custard,
ice cream,
Ted Drewes,
top five
Friday, June 4, 2010
Freebie Friday Birthday Edition
No, it's not my birthday...not even close. But I thought now would be a great time to share an awesome link I found that has a national listing of all the places you can go that will give you free food on or around your birthday! Now, this is by no means a complete list (Iggy's gives you a free entree on your birthday if you sign up for their birthday club at the restaurant) but it's a great start to at least see which national chains have yummies to offer!
Check out Mr. Cheap Stuff to see the list!
And remember to check out STL Meal Deals to see the birthday deals at many other local favorites!
I wonder if any restaurants give freebies for half birthdays.....
Check out Mr. Cheap Stuff to see the list!
And remember to check out STL Meal Deals to see the birthday deals at many other local favorites!
I wonder if any restaurants give freebies for half birthdays.....
Monday, May 31, 2010
End of the Blogathon
Well folks, this post brings us to the end of the blogathon. While I've had a lot of fun blogging everyday this month, I'm ready for a little break! Enjoy this follow-up recipe to yesterday's homemade gnocchi recipe while I take a step back from the blog for just a bit. I picked out an extra rich one to keep you full while I'm away. ;)
Gnocchi in Fontina Sauce
Enjoy! I'm sure I'll be back on Friday with another edition of Freebie Friday!
Gnocchi in Fontina Sauce
Enjoy! I'm sure I'll be back on Friday with another edition of Freebie Friday!
Sunday, May 30, 2010
Make Your Own Gnocchi
Last week I posted a very simple gnocchi recipe just to get you, and myself, started. This weekend, I did a little digging and found this recipe (with a 5 star rating no less) to make your own gnocchi from scratch! Wowee! If you have some time like I am going to over the next couple weeks (schoooooool's out for summer!) maybe you'd like to whip up a batch!
Check out this Food Network recipe by Michael Chiarello for potato gnocchi!
I promise to post with pictures when I make it...and I can't wait to get a potato ricer!!
Check out this Food Network recipe by Michael Chiarello for potato gnocchi!
I promise to post with pictures when I make it...and I can't wait to get a potato ricer!!
Subscribe to:
Posts (Atom)